Have you ever watched a baking show on tv or walked by a storefront window and been absolutely wowed by the designs you see? Well, while you may never be the Cake Boss, it’s very much possible to begin creating cakes that will amaze your friends and family. You can do so by working with fondant. Every home baker should take the time to learn the art of working with this fun ingredient.
What is Fondant?

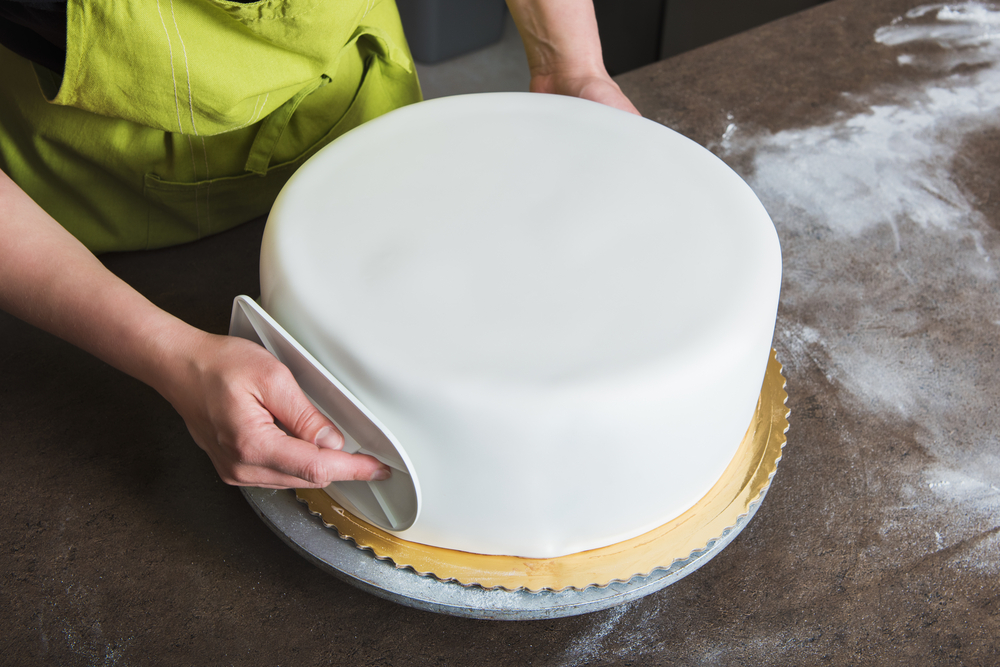
Fondant has been the staple of specialty cakes for years. It is an edible substance that is soft and pliable which makes working with it very easy. Imagine how a birthday cake looks when icing is smeared across the top of it. It is rough and inconsistent. Fondant eliminates this problem. These cakes are crisp and professional in appearance. They are very smooth, and at times, appear porcelain-like.
- Baking mat (2-pack) for easy and convenient baking, roasting, or food prep
- Food-safe silicone mats can be reused, again and again
- Non-stick, flexible silicone releases food without the need for oil, cooking sprays, or parchment paper
Typically, there are two different types of fondant, rolled and poured. Both kinds contain three primary ingredients:
- Confectioner’s sugar
- Corn syrup
- Water
Rolled fondant is similar to a thick dough. It is the more popular version of it. The thickness comes from gelatin that is added to the recipe, making it more durable. As the name indicates, this fondant is rolled into sheets, where you can then color any way that you, the baker, sees fit. Once rolled into sheets, you can use the entire sheet to layer and wrap the cake or create designs using a cookie cutter.
The other type is poured fondant. It does not contain gelatin which means it has more of a liquid consistency than rolled kind. You’ll often see it as a filling or icing for cakes. Like rolled fondant, the baker can color any way that they need. The icing on eclairs and Napoleons is often fondant because it is easy to pour and gives great results.
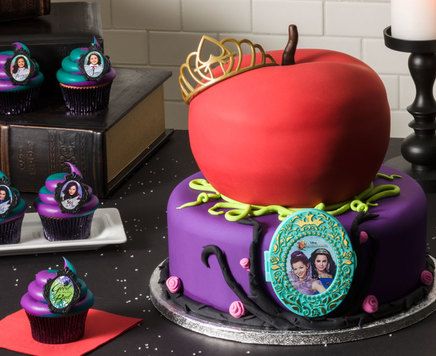
Because fondant has more consistency than icing, the design opportunities are endless. You can sculpt it into any design imaginable. You can texture it to create waves or ruffles among many other things. If you’re looking an example of how fondant is used, check out this gallery of amazing fondant cake creations. You might find an idea or two to use for your next project.
You may have actually already heard of, or seen, fondant used, but by another name. Some bakeries refer to it as rolled icing or icing paste. In Europe, it is known as sugar paste. However, it is not gum paste which has Tylose powder or other similar ingredients to create a thicker consistency.
How to Make Fondant
- ✅100% non-toxic and food-grade plastic, BPA free.
- ✅Cake Decorating Kit for Beginners: This fondant decorating tools set includes smother, rolling pin, lace...
- ✅Easy to Use: These cake decorating supplies are small in size, light in weight, good in hand feel.
Although you can buy fondant in some stores, it tastes just like you’d imagine. We recommend making your own DIY version. Not only will it taste better, but it will also be easier to roll and mold when fresh. And, you can make up a batch in less than an hour. Curious how to make fondant? There are numerous recipes that can be used for making fondant. We’ve listed a few of which below to get you started.
Poured Fondant
Poured fondant is very easy to whip together. This recipe, courtesy of King Arthur Flour, can be completed in 15 minutes. Begin by gathering the ingredients listed below.
- 4 cups sifted confectioner’s sugar (Substitute: glazing sugar)
- 1 cup white confectionary coating (Substitute: white chocolate chips)
- ¼ cup light corn syrup
- 1 teaspoon vanilla extract
- ¼ cup hot water
- Food coloring, any color
Draw a saucepan over low heat and melt the white coating, stirring along the way until it is completely melted. You can also use a microwave, but be sure to take out and stir in intervals so that you do not overcook the coating. Next, combine the confectioner’s sugar, corn syrup, and hot water into a large mixing bowl. Slowly stir until smooth. Try to avoid aerating the mixture.
Once this is smooth, add the white coating that is already melted. Once this has been combined, add the vanilla extract and food color, if you desire. When you’re done, you should be able to pour the mixture easily. Try adding a few drops of water and reheating the mixture if it’s too thick to pour. The fondant should reach its ideal viscosity at around 100°F.
Rolled Fondant
To make extravagant cakes, you’ll love this fondant. You can make this six-ingredient recipe from Best Recipes in about a half-hour. The necessary ingredients include:
- 7 cups confectioner’s sugar, sugar
- 1 ½ tablespoons glycerin
- 1 tablespoon gelatin powder
- ½ cup glucose syrup
- 1 teaspoon vanilla extract
- ¼ cup cold water
- Food coloring
Begin by combining the water and gelatin powder in a saucepan. Cook over low heat until the gelatin had dissolved. Make sure that you do not let the mixture boil. After the gelatin has dissolved, remove the saucepan from the heat and add the glycerin and glucose syrup. Stir until well blended. Then, add the extract and coloring. Lightly stir again. Pour this mixture into a bowl containing the confectioner’s sugar.
Continue to stir until all of the confectioner’s sugar has been absorbed into the mixture. Once there is no sugar remaining, begin kneading the dough until it is smooth. Once you are satisfied with the consistency, you can begin rolling the fondant. You’ll want to place it on a baking surface that is coated with confectioner’s sugar to keep it from sticking.
Using a rolling pin, begin rolling the fondant to your desired thickness. If you plan to use it to cover your cakes, we recommended that you roll until reaching a thickness of approximately ¼” thick. If you have leftover material, you can keep for future use by wrapping it in plastic and storing it in an airtight container. We don’t recommend storing it in the refrigerator or freezer.
Marshmallow Fondant
Marshmallow is commonly used for at-home fondant. If you’re looking to create children’s fondant cakes, this recipe from Craftsy could help. To begin, you’ll need the following ingredients
- 16 ounces mini marshmallows
- 2 tablespoons water
- ¼ teaspoon salt
- 2 tablespoons light corn syrup
- ¼ teaspoon lemon extract
- 1 teaspoon clear vanilla
- 2 pounds of sifted confectioner’s sugar
- ½ cup vegetable shortening
- Food coloring of your choice
Begin by greasing a microwave-safe bowl with vegetable shortening. The vegetable shortening on your ingredient list will be used later, so don’t touch it yet! Combine the water and marshmallows into a bowl, and microwave for one minute. Remove and stir for a minute, and then place it back in the microwave for thirty seconds longer. Continue this process until the marshmallows have melted entirely.
Once the marshmallows have melted, combine all remaining ingredients except the powdered sugar into the bowl. You should also add your food coloring at this point. If you would like pearly-white fondant icing, you should add white coloring. Mix these ingredients together thoroughly. Then, add half of the powdered sugar, and mix until it’s impossible to add any more.
Spread the remaining powdered sugar across your baking surface as if it were flour. Empty the bowl of fondant onto the counter and begin kneading the dough. When kneading, be sure to work the dough outside-in. Continue to work it until there is no powdered sugar remaining on your baking surface.
Then, rub your hands in the vegetable shortening. Continue kneading until the sugar is well worked into the dough. By the time you are done, the fondant should be smooth. You may need to add vegetable shortening along the way to help make the dough pliable. Coat the fondant with vegetable shortening one last time and wrap it in plastic wrap. Allow it to sit overnight in a zippered plastic bag before using.
Tools for Working with Fondant
As you become more comfortable working with fondant, you’ll find that there are a number of tools that you can add to your baking supplies repertoire.
One of the first tools you should purchase is a fondant smoother. It can help with the presentability of your sugar paste and can help eliminate any air bubbles or wrinkles that appear while rolling. It can also be used once you’ve applied it to the cake to help create crisp edges for a sculpted look.
You may also think about purchasing a fondant modeling toolkit. You can use these tools to create any number of imprints and designs on your fondant. A set of these tools is very affordable. It’s one of the easiest ways to create fun patterns on your cakes.
We also recommended that you have a ruler on hand, especially as you get more intricate with your designs. Not only can a ruler help you measure designs accurately, but it can also be used to cut straight edges. That will give your cakes a professional look.
Finally, you might consider purchasing a pair of scissors specifically for your fondant. You need to be careful when handling this material, especially if you’re working with a lighter color. Scissors that you use for baking may cross-contaminate the fondant or stain it. Having a dedicated pair of scissors for your baking projects will not only keep your mixture clean and crisp without unexpected staining.
Last update on 2025-06-30 at 16:14 / Affiliate links / Images from Amazon Product Advertising API


Pingback: Meijer Cakes Bakery Review (with Images)