Planning a baby shower for someone you love can be both fun and incredibly stressful. Trying to figure out a baby shower cake design can add to that stress, I know from experience. When I was planning my best friend’s baby shower, I looked through hundreds of cake designs trying to find the perfect one.
You see, once you have narrowed the cake down by gender, in this case, a girl, you realize that’s only the first step. Now, you have to figure out if you are going to bake the cake yourself, have someone else do it, what design best suits the shower decorations and your loved one’s personality, etc. But it is all worth it at the end of the day when you see the smile on the expectant parents’ faces.
Luckily for you, I have been through this process many times and have compiled a list of baby shower cake designs that I think are pretty cool.
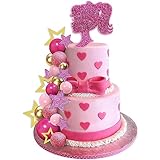


Cool DIY Baby Shower Cakes for Girls

Image CC0, by 3907349, via Pixabay
Remember, you can think outside of the box when making your baby shower cake. The possibilities are endless. The following cakes for girls can all be made at home if you do not want to order one.
Flowerpot
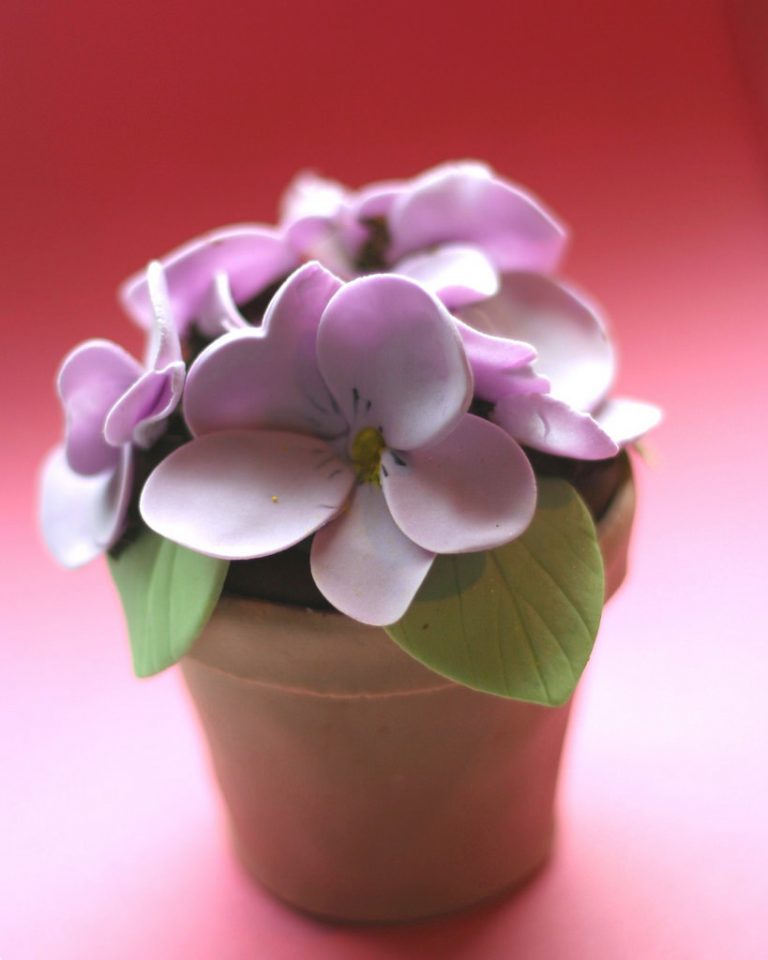
Image CC by NC ND 2.0, by clarescupcakes.co.uk, via Flickr

- 22, Blissful (Author)
- English (Publication Language)
- 200 Pages - 08/20/2021 (Publication Date) - Independently published (Publisher)
1 box of devil’s food cake
3 tablespoons unsweetened cocoa powder
1 1/2 containers of milk chocolate frosting
1/4 teaspoon orange gel food coloring
3/4 teaspoon red gel food coloring
1 24-ounce package white fondant
Straws
Fresh flowers
Baking Directions
First, follow directions on cake box and make the batter. Second, line an 8-inch-round and 6-inch-round cake pan with parchment paper, coat them with cooking spray. Next, divide the batter between the pans, bake 25 to 30 minutes, remove from oven and let cool.
After the cakes have cooled, level the tops with a serrated knife. Put the scraps aside and halve the cakes horizontally. Then stack the 8-inch lays and then the 6-inch layers. Frost between each of your layers. Use your knife and trim the edges of the cake, so they look like an upside down flower pot. Cover the cake with all but 1/2 cup of frosting and freeze the cake for 30 minutes.
Decorating Directions
Sprinkle three tablespoons cocoa powder on a sheet of parchment paper. Place the fondant on it, make a well in the middle, add food coloring and then knead until color is even. Put more cocoa powder down, place the fondant on top. Next, roll it into a 24-by-6 1/2-inch rectangle. Trim the edges to make them straight. Cut a 24-by-1 1/4-inch strip of the fondant and set it aside.
Wrap the wide fondant around the cake, smooth it and trim the edges. Take the scraps and reroll them, cut a 5-inch circle and press it on top of the cake to make the pot bottom.
Next, flip the cake over, brush a thin strip of fondant with water. Afterward, attach it to the top of the cake and allow it to come slightly above the edge, trim to make even. This will look like the top of the pot. Cover the top of the cake with the rest of the frosting and crumble the cake trimmings on top to make “dirt.”
Finally, insert straws into the cake and put fresh flowers into the tubes. If you don’t want to use fresh flowers, make some edible ones like the ones pictured above.
Ombré Rosette Cake
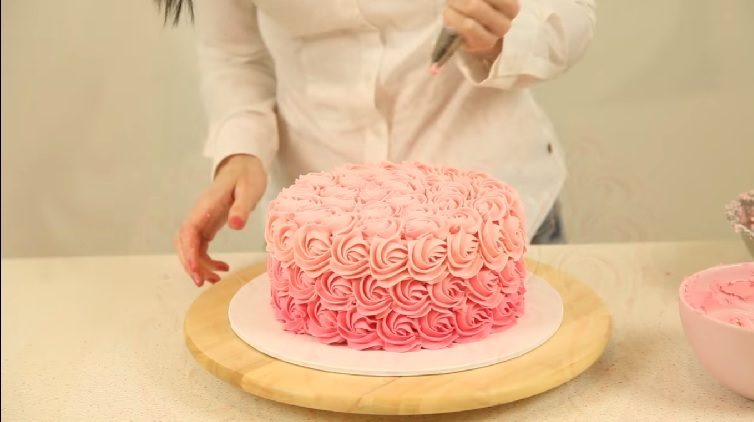
Image screenshot, by Cake Style, via YouTube
Rosette cakes have gained in popularity because of their beauty. If you are looking for a baby shower cake that is beautiful and sophisticated, this may be the cake for you.
Ingredients
2 1/2 teaspoons baking powder
1 1/2 cups cake flour
2/3 cup whole milk, at room temperature
1 cup plus 2 tablespoons granulated sugar
4 large egg whites, at room temperature
3/4 teaspoon salt
1/2 cup unsalted butter, room temperature and cut into chunks
2 teaspoons almond extract
1 teaspoon vanilla extract
a few drops of pink food coloring
Rosettes
Cake board
4 1/2 cups light pink frosting (whichever type you prefer)
1 1/4 cups medium pink frosting
1 1/4 cups dark pink frosting
3 piping bags
3 star tips piping
Cake directions
First, preheat your oven to 350 degrees Fahrenheit. Then grease three 6-inch round pans and line the bottoms with parchment paper. After you’ve prepared your pans, combine flour, sugar, salt and baking powder in a large mixing bowl.
In a small bowl, whisk together egg whites, milk, vanilla and almond extracts until well combined. Mix butter, one chunk at a time, with an electric mixer into the flour. When all of the butter is mixed, the dough will resemble crumbs. Next, add all but one-third cup of the milk and egg mixture to the flour, beat on low for 90 seconds. Add the food coloring and the rest of the milk, mix at low speed, scraping the sides as you beat it.
Pour equal amounts of the batter into the three pans and bake for 20-23 minutes or until a toothpick comes out clean when inserted. When finished baking, allow the cakes to cool on wire racks for 15 minutes. When they’ve cooled for 15 minutes, flip them out of the pans and let them cool completely.
Rosette directions

Image screenshot, by Cake Style, via YouTube
After your cakes have cooled, you must stack them. Put the first one down on the cake board and put 1/2 cup of light pink frosting on it. Spread the frosting and repeat for the second layer. Next, put 3/4 cup on top of the cake, spread it on top and then a thin layer all around the sides. Put the cake in the refrigerator to chill for 30 minutes.
While the cake is chilling add remaining light, medium, and dark pink frosting into the three bags with the tips on them. Remove the cake from the refrigerator and begin making the rosettes.
First, you will add the dark pink rosettes in one row around the bottom of the cake. Basically, imagine you are making a lowercase “e.” Hold your bag a little bit above the surface, squeeze softly and pretend you are writing the lowercase “e.” As you get to the end of the “e” decrease pressure. Repeat this process along the bottom row.
Next, use the medium pink to do another row of rosettes in the middle. Do the third row on the top of the sides of the cake with the light pink frosting. Finally, repeat the light pink flowers at the very top of the cake.
If you are a visual learner, watch this video below:
Cake Designs To Show Your Local Baker
Although those two DIY baby shower cake recipes are awesome, you may not want to spend all that time baking and decorating. That’s perfectly fine. This belly baby shower cake decorated with frosting roses and a pretty bow might be exactly what your loved one wants. If that is not their style, maybe they would like this glittery cake with pearls. Cakes with baby boots, ruffles, a baby’s diapered butt, or even animal print may be what she wants.
Non-Gendered Baby Shower Cakes for Gender Reveal
A gender reveal cake is another possibility for a baby shower. You can find a lot of really cool baby shower cake ideas for a gender reveal here, or you can bake a simple one yourself. The following recipe would be a great baby shower cake for a gender reveal.
Funfetti drip cake
Ingredients
1 cup (2 sticks) butter softened
1/2 cup vegetable shortening
2 teaspoons baking powder
3 cups granulated sugar
1/2 cup whole milk room temperature
1/2 cup buttermilk room temperature
3 cups all-purpose flour
5 large eggs room temperature
1/4 teaspoon salt
2 teaspoons vanilla extract
Few drops of gel food coloring (either pink or blue)
4 cups of buttercream frosting
Colorful sprinkles
Drips
1 cup white chocolate
1 cup heavy cream
Few drops of yellow gel food coloring
Cake directions
First, preheat your oven to 350º F. Grease three 9-inch round cake pans and set aside. In a large bowl, cream butter and shorting until fluffy with an electric mixer. Next, add sugar one cup at a time mixing well each time. Add eggs one at a time, mixing well between each egg.
In another bowl, mix flour, salt, and baking soda. Pour the milks and vanilla into a measuring cup, mix them together. Next, start with dry ingredients and alternate with milk, adding them to the butter mixture. When batter is well-combined add either blue or pink gel food coloring to the mix until you see your desired color.
Pour batter into three cake pans in equal amounts. Bake for 25-30 minutes or until a toothpick is inserted and comes out clean. Allow cakes to cool for five minutes, then remove from pans and allow them to cool completely before frosting.
When the cakes have cooled, add some frosting to a rotating cake dish. Press the first cake on top of the frosting, add about 1/2 cup of frosting to top. Spread the frosting out evenly and then add the next layer. Repeat this process for the second layer. When you get to the final layer of cake, add some frosting to the top and spread on top and around sides in a thin layer. Chill the cake for ten minutes.
Cake decorating instructions
When your cake has chilled, pull it out of the refrigerator and frost the cake again. After it is frosted, add colorful sprinkles to the bottom of the cake immediately. You want them to come up almost halfway on the cake.
In a microwave-safe bowl, add equal parts white chocolate and heavy cream. Microwave in 15-second intervals stirring in between until the mixture is thin enough to “drip” on the cake.
After you’ve reached your desired consistency, add gel coloring and let it cool so it thickens for a few seconds. Pour about half a cup on the top of the cake and spread it so it drips over the edges. You may have to add more. Once you have it dripping over the edges, you can use a piping bag to add extra drips to the side.
Finally, add more sprinkles to the top of the cake. You can also stick accessories on the top like lollipops or a big question mark. Whatever you want.
Watch the following video to see how drip cakes are made:
The Possibilities For a Cool Baby Shower Cake Are Endless
Whatever baby shower cake you decide to go with, just remember to have fun with it. There are hundreds of ideas to choose from and the possibilities are endless. And hey, if you mess it up, just remember, you can always start over. Actually, it would be a good idea to make a practice cake the week before your event. Enjoy!
Featured image: CC by-ND 2.0, by Erin Warren, via Flickr
Last update on 2024-04-20 at 01:53 / Affiliate links / Images from Amazon Product Advertising API